cPanel FTP Usage and Maintenance
Usage and Maintenance of FTP Accounts to Download/Upload directories and files from/to cPanel hosting space.
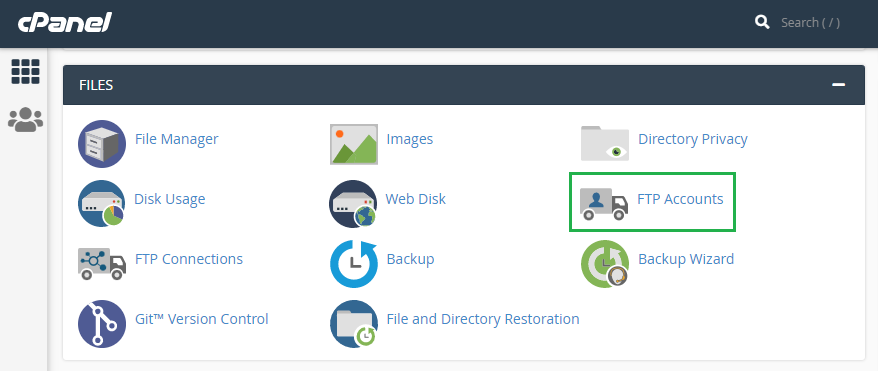
I. Create FTP Account
-
Login to account cPanel. Under Files section, click on FTP Accounts.
-
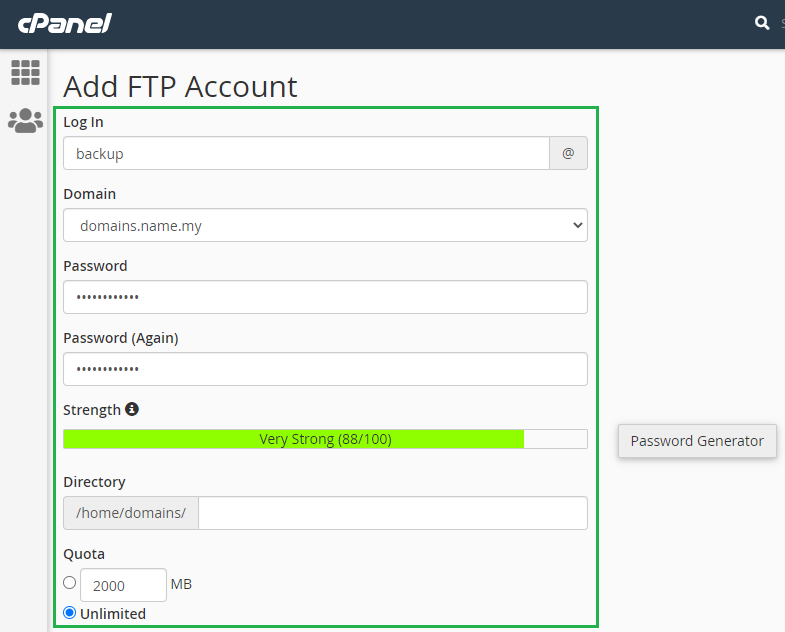
Create an FTP account as follows:-
-
Log In: FTP Username (e.g. backup)
-
Domain: The cPanel account domain (e.g. domains.name.my)
-
Password: FTP Password
-
Directory: The home directory of the FTP account (which directory the user accesses upon login) (e.g. LEAVE BLANK, for access to the cPanel whole account directory)
-
Quota: Unlimited
-
-
Click Create FTP Account.
II. Connect to FTP Service
-
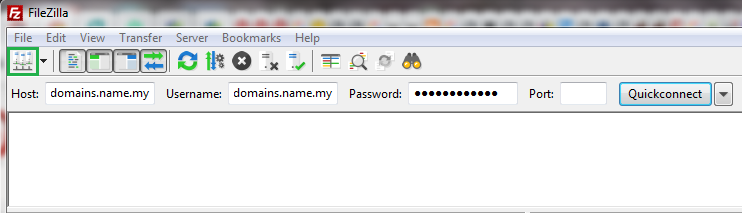
From any remote PCs, download and install Filezilla Client from https://filezilla-project.org/ .
-
You can choose quick connect method as shown here, or click on Site Manager on the icon highlighted in green square:-
-
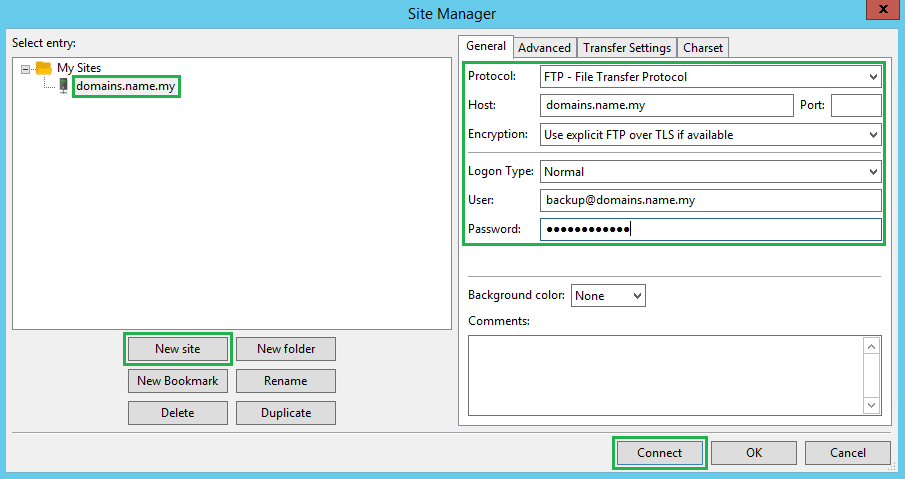
In Site Manager, click New Site and enter any name (e.g. domains.name.my), and fill in the FTP server details as follows:-
-
Protocol: FTP - File Transfer Protocol
-
Host: <YOUR DOMAIN NAME> (e.g. domains.name.my)
-
Encryption: Use explicit FTP over TLS if available
-
Logon Type: Normal
-
User: <YOUR FTP USER> (e.g. backup@domains.name.my)
-
Password: <YOUR FTP PASSWORD>
-
-
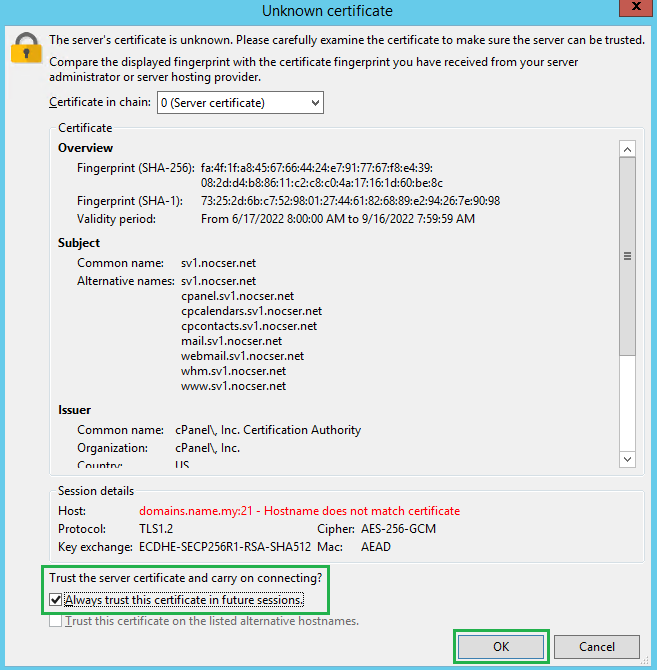
Click Connect. If you are prompted by Unknown Certificate message, tick Trust the server.. and Always trust.. options, and click OK.
-
If all goes well, you should be logged in to your cPanel account space. The important directories are:-
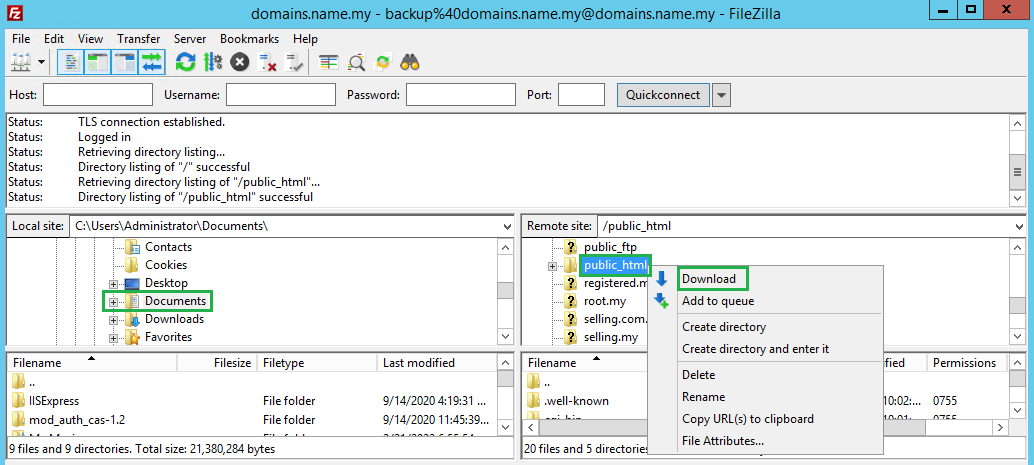
-
public_html: This is the cPanel account's main website directory.
-
<ADDON DOMAIN NAME>: This is the cPanel account's addon domain directory, normally with names corresponding to the domain name hosted.
-
-
DOWNLOADING: To download the whole website folders and files for backup purposes:-
-
Choose the destination local folder in left panel
-
Choose the source remote folder in right panel. Right click on that folder and click on Download.
-
-
UPLOADING: To upload whole local folders and files to the server for restore purposes:-
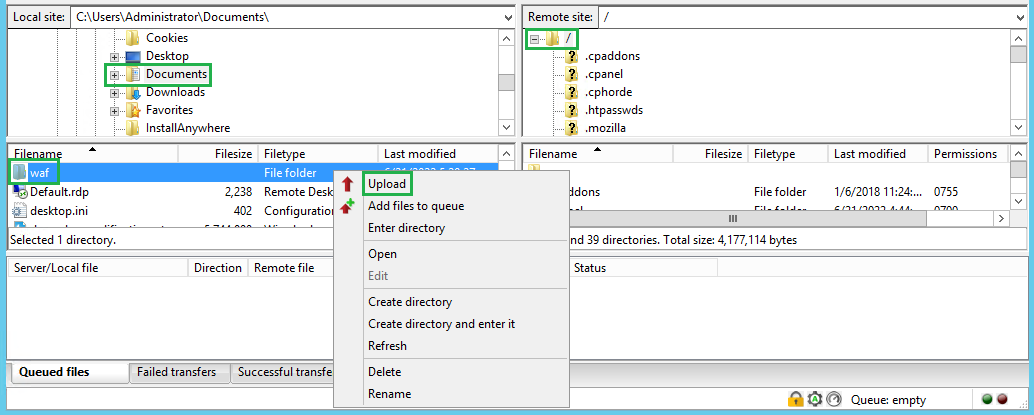
-
Choose the destination remote folder in right panel
-
Choose the source local folder in left panel. Right click on that folder and click on Upload.
-
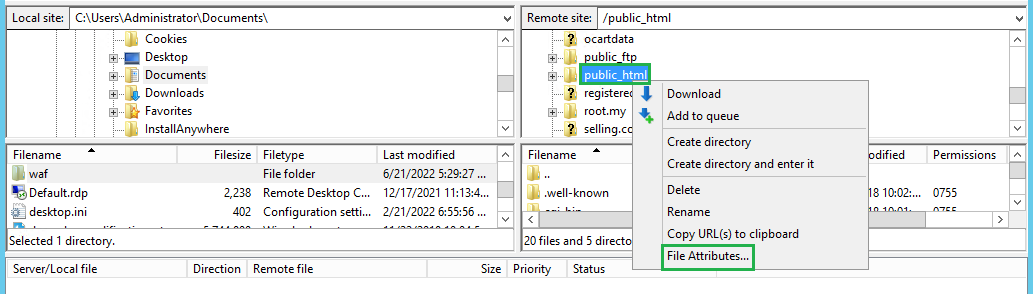
III. Locking Web Directories
If your website files and directories no longer need any modifications, it is recommended to lock them from further tampering. You can do this via Filezilla FTP Client as follows.
-
Connect to the FTP service for your website as shown above. Right click on the website folder (public_html if main website, or any addon domain directory as created via cPanel), and click File Attributes.
-
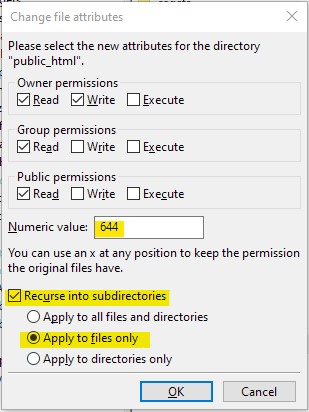
In File Attributes, perform selections as follows and click [ ok ] to change all files in public_html to 644:-
-
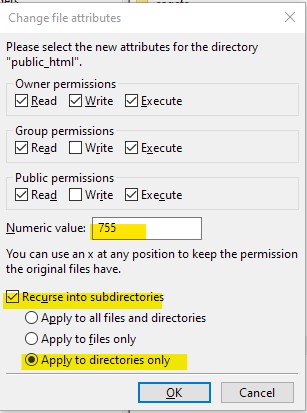
In File Attributes, perform selections as follows and click [ ok ] to change all Folder in public_html to 755:-
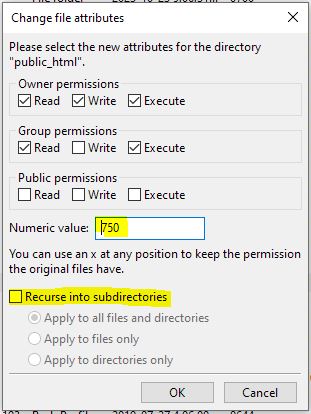
- In File Attributes, perform selections as follows and click [ ok ] to change public_html folder to 750:-
IV. Unlocking Web Directories
If your locked website files and directories need modifications, or you want to leave certain folders writable (such as images, uploads, etc), you can selectively unlock them via Filezilla FTP Client as follows.
-
Connect to the FTP service for your website as shown above. Right click on the folder to be unlocked, and click File Attributes.
-
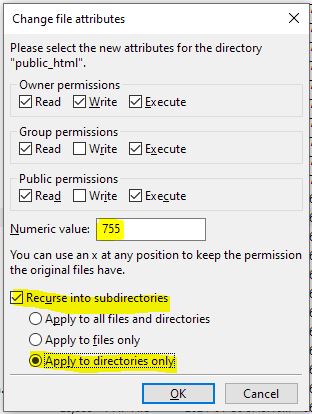
In File Attributes, perform selections as follows and click [ ok ] to change all Folder in public_html to 755:-
-
In File Attributes, perform selections as follows and click [ ok ] to change all Files in public_html to 644:-

